The DIY Tax Exempt Checkout app allows Shopify merchants to recognize their tax-exempt customers during checkout so taxes aren't collected on their orders. This permits the merchant to engage with new tax-exempt customers 24/7 without manually gathering supporting documentation and setting up customer profiles ahead of time.
Out of the box, the app can require the visitor to enter their tax certificate number or upload documentation. It also allows merchants to extend the app's functionality by including HTML-formatted links in the tax-exempt widget to collect other information of interest.
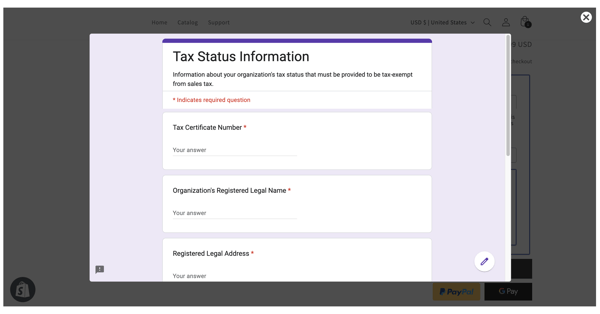
Add a Link to a Popup Form Example
A prerequisite for this example is that the DIY Tax Exempt Checkout app is installed on the Shopify store.
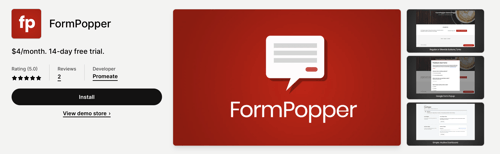
In this example, the app FormPopper (available in the Shopify App Store) will be used to render a form in a popup when a link in the Tax Exempt Status widget is clicked. Google Forms will be used to create the form. Afterward, the two will be used to add a link in the Tax Exempt Status widget.
Step 1: Install the FormPopper app from the Shopify App Store
Log into your Shopify store as the Store Owner.
Navigate to Settings > Apps and sales channels.
Click the button Shopify App Store at the top-right corner of the page.
Search for "FormPopper" and click the install button. Follow the installation wizard prompts to complete the installation.
Step 2: Create your Google Form
You must have a Google Workspace account or other access to Google Forms to complete this step.
Access Google Forms and create your form following Google's instructions.
In the Settings, select Do not collect for the Collect email addresses by default setting.
Ensure no settings restrict access to the form to only those in your organization.
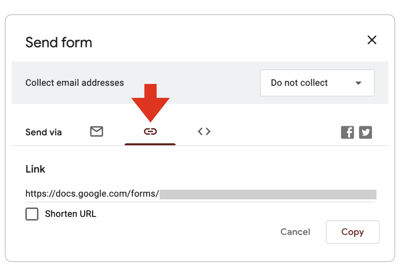
Click the Send button in the top-right corner of the page.
Select the link icon in the Send via menu and copy the URL that Google has assigned to the form.
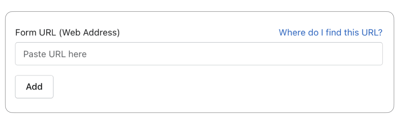
Step 4: Associate the Google form with FormPopper
Navigate to Apps > FormPopper using the Shopify ADMIN menu.
Paste the URL to the Google form into the Form URL (Web Address) field and click the Add button.
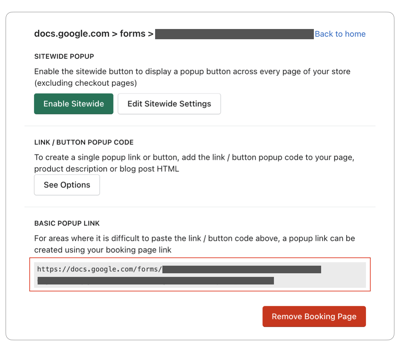
Click the entry that was added for your form.
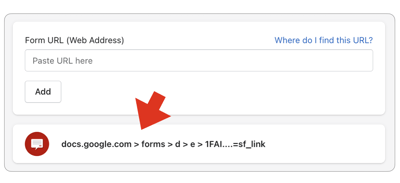
Copy the URL listed in the section with the heading BASIC POPUP LINK.
Step 5: Add the popup link to the Tax Exempt Status widget
How to add the popup link to the Tax Exempt Status widget will depend on what time of theme you use. Instructions on how to add it to an Online Store 2.x theme will be provided in Step 5a. Instructions on how to add it to a Vintage theme will be provided in Step 5b. Read the instructions that correspond to the type of theme you use.
Step 5a: Add the popup link to an Online Store 2.x theme
Use the Shopify ADMIN menu to navigate to Online Store > Themes.
Click the Customize button.
At the top of the page, choose Cart and the theme page you to work on.
![]()
Locate and select the Tax Exempt Checkout app block.
There are two settings that will allow you to include the link to the popup form. They are labeled
- Preface text for the email input field.
- Preface text for the certificate number field.
Save your settings.
The link will appear in the Tax Exempt Status widget according to your settings.
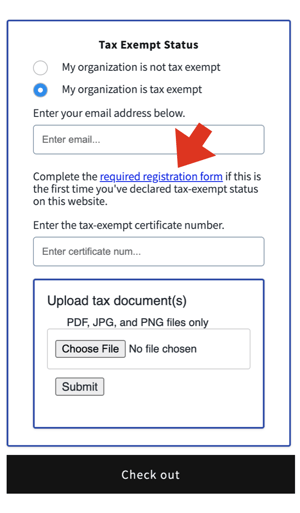
When the visitor clicks the link, the form will appear on the Cart page.
The visitor will be returned to the Cart page after submitting or canceling the form.
Step 5b: Add the popup link to a Vintage theme
Use the Shopify ADMIN menu to navigate to Apps > DIY Tax Exempt Checkout.
In the app's navigation menu, click on For Vintage Themes.
There are two settings that will allow you to include the link to the popup form. They are labeled
- Enter the text you want to preface the email input field. You can include HTM tags to format the text or provide a link to a page on your website.
- Enter the text you want to preface the certificate number field. You can include HTML tags to format the text or provide a link to a page on your website
<a href="url">link text</a>
Replace url with the BASIC POPUP LINK you copied from Step 4 of these instructions.
Replace link text with the text string you want to be seen in the instructions.
The link will appear in the Tax Exempt Status widget according to your settings.
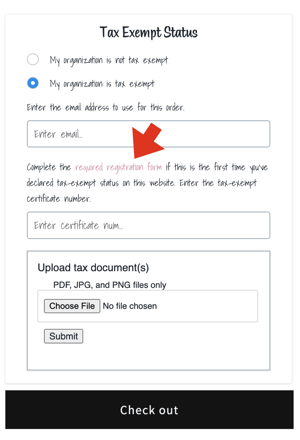
When the visitor clicks the link, the form will appear on the Cart page.
The visitor will be returned to the Cart page after submitting or canceling the form.
Frequently Asked Questions
Do I have to use FormPopper and Google Forms?
FormPopper and Google Forms were chosen to demonstrate an example of how to solve a frequent inquiry we receive. FormPopper only supports Google Forms and Typeform. If you want to present your form in a popup and don't want to use Google Forms or Typeform, you'll need to find an alternative to FormPopper. Use any tools compatible with the DIY Tax Exempt Checkout app that suit your purpose.
Must the form be presented in a popup?
No. Different tools have different capabilities. The capability of the tool or tools you've chosen will determine what options are available. It's not uncommon to have the form open in a new tab or window instead of a popup.
How will the form render on a mobile device?
You are extending the functionality of the DIY Tax Exempt Checkout app by embedding a solution from another party. How that solution behaves in a mobile environment will depend on the capability of that solution.
How is data collected on the form processed?
Data collected by forms linked in the DIY Tax Exempt Checkout app will be processed according to the capabilities of the form builder and the settings you enable in it. Some form builders send the submission results to a designated email address. Some collect and store the data in your account on their platforms. Some will allow the data to propagate to cloud-based applications like email marketing programs, CRMs, and accounting systems. Some form builders published as Shopify apps will write the data collected to Shopify's metadata fields. One criterion you should consider when selecting a form builder is how that data will be collected and stored.
Can a form be used to upload files?
Many form builders have an option to allow for submissions to include uploaded files.
Can the visitor be forced to complete the form before continuing?
This is a difficult question to answer. To force a visitor to interact with a form, using an overlay and popup form like the ones used in this example will require the visitor to take action before returning to the Cart page. However, this example allows the visitor to cancel out of the form to return to the Cart page. You may find a solution that disables the Cancel button or "X" control, so submitting the form is the only available action.